


Minimal effort, maximum relief
(Photo: Model: Ben Ko/Allie Jorde Creative; Design: Ayana Underwood/Canva)
Published September 30, 2025 02:08PM
I know from firsthand experience the wear and tear that backpacking can have on the human body. As a long-distance thru-hiker, I’ve traversed 20 to 36 miles a day on mountain climbs, forest trails, and canyon rubble-hops. And as a backcountry ranger at Grand Canyon National Park, I’d log 10 to 20 miles each day while doing search-and-rescue for hikers who had pushed past their limits.
The body keeps the score. The downhill knee-crunch, the backpack-lower back train wreck, the way your neck feels like a wire cable after carrying a load all day, and every flavor of sore and achy feet are real. If you go too far, too fast, you will know it.
So I’ve forced myself to take a “check yo’self before you wreck yo’self” approach to backpacking by ending each day with some critical stretches. Not just any stretches. A particular type of stretching that is proven to be efficient at releasing tension and preventing injuries.
The stretches are actually a style of yoga. Known as Yin Yoga, it targets muscular tension through a comfortable yet challenging stretch that lengthens tense muscles and releases pressure points caused by repetitive movements on the trail. Let yourself settle into some slight discomfort as the sustained tension works its magic.
If the weather is less than ideal, you can still do the following stretches in your tent.
9 Essential Stretches for Backpackers
On an overnighter, your backpack becomes your traveling yoga studio. Your sleeping pad turns into a yoga mat, your sleeping bag becomes a blanket, and your backpack makes a sturdy support in more restorative stretches. You can also roll extra clothing layers or your sleeping bag into supportive “blocks” to slide beneath your knees, neck, and lower back.
1. Toes Squat

If you have time for only one pose at the end of the day, make it this stretch. One of the first lessons long-distance backpackers learn is that a happy foot makes for miles. This toe squat helps loosen tendons that are wound tight from traversing uneven trails, hopping boulders, and breaking your previous record number of steps in a day.
By releasing tension in the plantar fascia along the bottom of your feet, you decrease your risk of hike-ending plantar fasciitis.
How to Do It:
- Come to kneeling on the ground or your sleeping pad.
- Tuck your toes and keep your spine straight as you sit back on your heels.
- Keep your weight on the balls of your feet. (If you’re barefoot or in socks, spread your toes wide to feel a stretch along the arches of your feet. Really spread that pinkie toe out like a kickstand.)
Tips: Toe Squats are intense, so begin with shorter sits if your feet feel stiff. Slowly work toward holding for one to three minutes. If the stretch becomes painful, bring your hands to the ground and shift your weight forward to relieve the pressure.
2. Thread the Needle
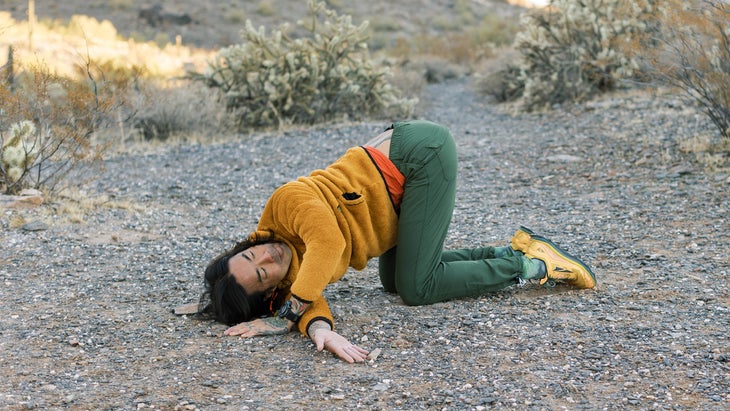
Ever told stories around the campfire? Chances are, you did so with a slumped posture from lugging a heavy pack up mountains or down canyons all day. This twist eases tension along your upper back and outer shoulders, helping to relieve those pesky knots between your shoulder blades.
How to Do It:
- Come to your hands and knees with your shoulders over your wrists and your hips over your knees.
- Press your hands into the ground or sleeping pad.
- Inhale as you lift your right arm toward the sky, turning your upper body to the right and stretching across your chest.
- Exhale as you slide your right arm behind your left wrist until your right shoulder and the side of your head rest on the ground or pad.
- Lengthen through your back.
- Breathe here as long as you like.
3. Lizard Pose
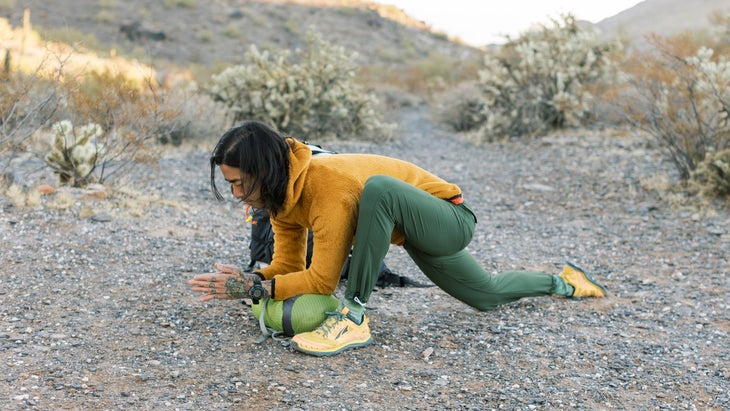
This stretch releases some of that tension in your overtaxed hip flexors. Use your backpack or your sleeping bag crammed into its compression sack beneath your forearms. In addition, your back leg benefits from a lengthening quadriceps stretch. Easing tension in the muscles along the front of the body can help long-distance hikers ease lower back pain.
How to Do It:
- From hands and knees, step one foot forward between your hands so that your knee is stacked over your heel in a Low Lunge. Inch your back knee further away from you to intensify the stretch.
- Bring your forearms to the ground or prop them on your backpack or compression sack in Lizard Pose.
- Hug your forward knee toward your shoulder and try to release the tension in your upper body.
- Let your body weight sink into the ground.
- Breathe here for 3-5 minutes and then switch sides.
4. Sphinx
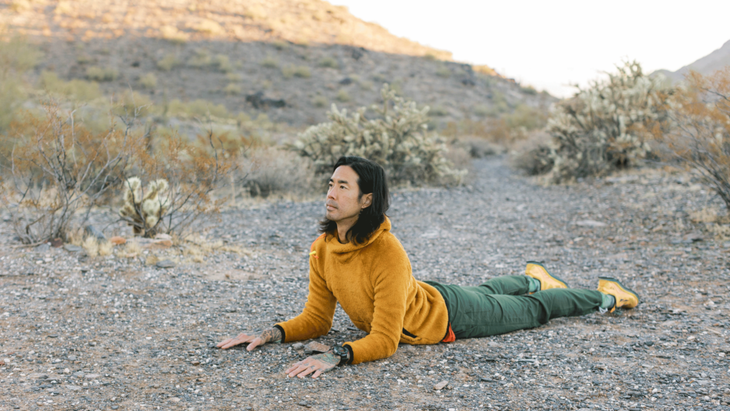
Poor posture is one of the most common contributors to aches and pains. The simple supported backbend, known as Sphinx Pose, releases the accumulated tension caused by hunching forward while carrying a pack. Sphynx also invites slow, deep, grounded breathing, which can help you expand through the chest and ease tension along the spine.
How to Do It:
- Lie on your stomach and place your elbows under your shoulders, and rest your forearms on the ground or your sleeping pad.
- Take your legs hip-distance apart or wider.
- Inhale and press into your arms to lift your head and chest.
- Engage your lower abs, draw your kneecaps toward your thighs, and inwardly rotate your thighs.
- Exhale and let your hips sink into the ground.
If your shoulders are exhausted, place your backpack beneath your front ribs and let your weight rest on it. Focus your awareness on expanding your chest as you inhale and settling your lower body into the ground as you exhale. Breathe here for one to three minutes. Come out of the pose by pushing back through your hands and come to kneeling.
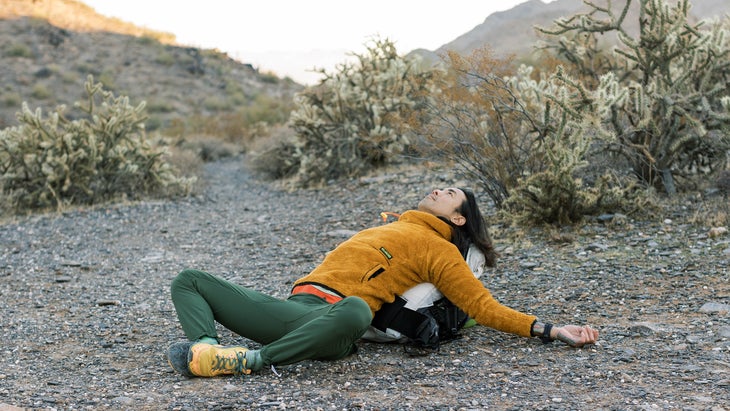
5. Restorative Hero’s Pose
Quads are the hero of any hike, contracting each time you take a step along a steep incline. This muscle deserves a break after lots of scrambling or elevation gain. Supta Virasana, or Reclining Hero, is one of the most effective quadriceps stretches for high-mile runners who want their legs to feel well-rested in the morning. It releases tensions not only in the quads but also in the ankles, hip flexors, and sacral-lumbar arch of the low back, all at once.
How to Do It:
- Come to kneeling with your knees together and your feet slightly wider than your hips.
- Lower yourself to sitting between your heels. (Note: If you haven’t practiced this stretch before, slide your backpack or compression sack beneath you to elevate your hips.)
- Press the tops of your feet into the ground and exhale as you slowly walk your hands behind you. (Up the challenge: if it feels OK for your lower back and knees, keep walking your hands backward, and lower the trunk of your body to relax on your backpack. You should feel the stretch along your quadriceps. If this is too intense, slowly walk yourself out of the pose and try sitting upright.)
- Relax your arms at your sides or place them on your belly to feel the movement of your breath.
- Stay here for at least two minutes.
- Breathe comfortably for several minutes.
Modification: If you feel tension in your lower back or knees (see photo below), try the position with only one leg bent at a time or by placing the foot of your bent leg on the ground in front of you. If you experience pain in your lower back or knees, come out of the pose and try the next one. Lean on one side and slowly straighten one bent leg, and then the other, before switching sides.
6. Supported Forward Bend
Hiking causes the hamstrings to contract repeatedly. Long-held stretches that lengthen the hamstrings can deliver relief. This wide-legged forward bend creates space not just along the backs of your legs but in the hip adductors of the inner thighs.
How to Do It:
- Come to a seated position and spread your legs wide.
- Place your backpack lengthwise between your legs.
- Inhale as you lengthen through the spine and exhale as you tilt your hip bones slightly forward and drape yourself forward over the backpack. (If your hamstrings feel tight, place a rolled jacket as a cushion under your glutes to help raise and rock your hips. If you are still feeling tightness in your hamstrings, place rolled clothes underneath each knee to ease the tension along the back of your legs. If you need the backpack lifted higher so you can rest against it, prop a rolled sleeping pad or stuff sack beneath the far end.)
- Rest your front body onto the backpack and turn your head to one side.
- Try slowly inhaling for a count of 4 and exhaling for a count of 8, lengthening the exhale. Stay here for 3-5 minutes.
- Slowly lift yourself out of the pose, lean back on the arms, and gently bring your legs together.
- Pause here to notice the sensations before moving into another pose.
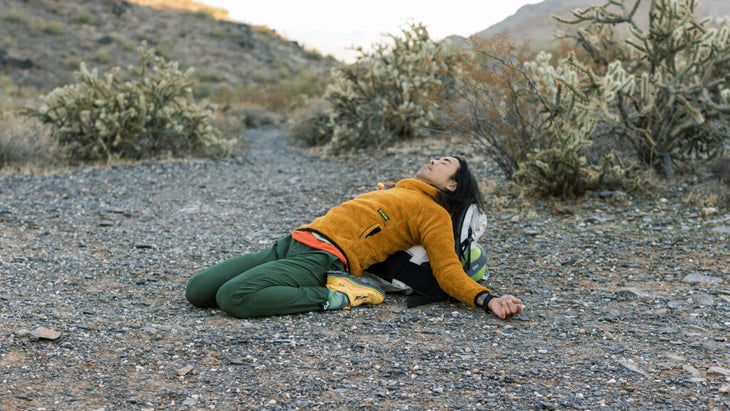
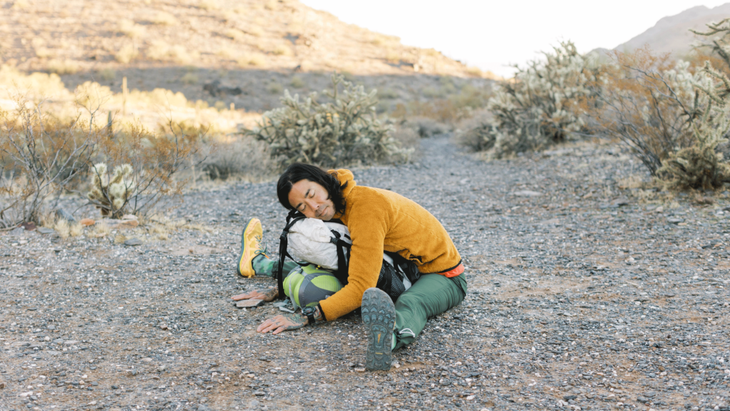
7. Supported Spinal Twist
This twist, with the support of your backpack, encourages a gentle range of motion in the thoracic spine and helps offset the compression of carrying your belongings on your back all day. It’s also like a massage for your nervous system and can help you fall asleep.
How to Do It:
- Position your backpack lengthwise in front of you.
- Sit with one hip at the short side of the backpack, closest to you, and turn your upper body to bring your chest to face the pack.
- Place one hand on either side of the backpack and take your time as you lower your chest onto the support while lengthening through your spine.
- Try turning your face in the same direction as your legs and relax here.
- Allow your arms to drape to either side and let your entire body weight sink onto your pack. Rest here for 3 to 5 minutes, lengthening your exhalations.
- When you’re ready, slowly sit up, facing away from your pack. Then, bring your other hip alongside your pack and repeat on this side.
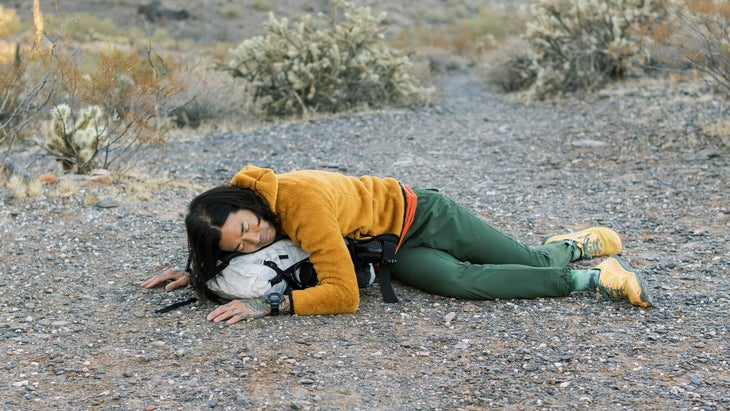
8. Reclined Bound Angle
This pose offers complete relaxation. The opening of the hips is intended to be a gentle stretch rather than a painful strain. The support beneath your back encourages your abdominal muscles to relax and your chest to release. It’s an opportunity to observe the tension slip away from your body and mind.
How to Do It:
- Sit facing away from your backpack with its short edge behind you.
- Bend your knees and bring the bottoms of your feet together.
- Bring your heels closer to you to intensify the stretch or slide them away from you for a more relaxed stretch.
- Slowly walk your hands behind you on either side of the backpack as you recline onto it. (If you feel tension in your hamstrings or your lower back, slide some rolled jackets beneath each knee.)
- Release your weight into the backpack.
- Gently squeeze your shoulder blades together before allowing them to release.
- Close your eyes and feel your breath.
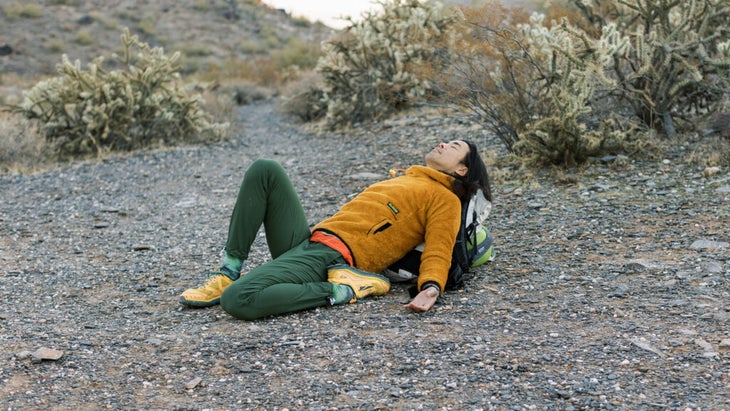
9. Supported Savasana or Legs up a Tree
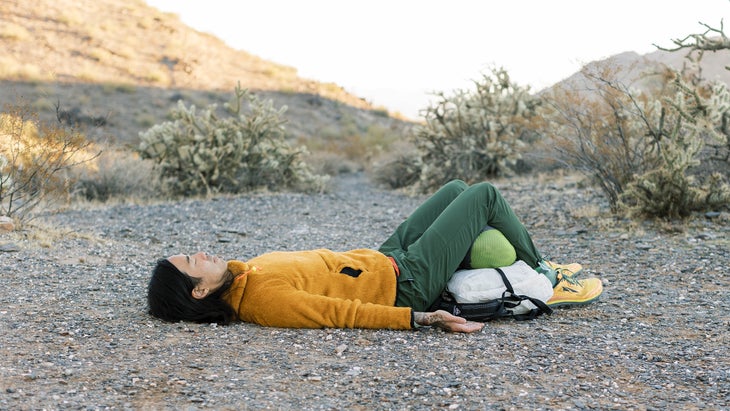
If you lie down with your legs straight after a day of strenuous hiking, it can be uncomfortable due to the pressure on your lower back. To minimize that tension, practice Savasana with your backpack beneath your knees. This pose gently releases tension in the lumbar spine and eases lower back aches.
How to Do It:
- While sitting upright, place your sleeping pad or pack underneath your knees for a supported Savasana.
- Lie back with your upper body on the ground.
- Place your arms alongside you, palms turned up, or place your hands on your lower belly to feel your breath.
- Feel your legs relax and your lower back spread wide on the ground.
- Let your back, shoulders, and neck release into the ground.
- Breathe here for at least 10 minutes before gently rolling out of the pose.
Model: Ben Ko is a longtime student of yoga and all things outdoors. He’s also a hairstylist based in Scottsdale, Arizona.
Location: Photographed at the Freedom Trail near Piestewa Peak in the Phoenix Mountains.
Want more Outside health stories? Sign up for the Bodywork newsletter. Ready to push yourself? Enter MapMyRun’s You vs. the Year 2025 running challenge.